Bacon is utterly addictive. Maybe it’s the smoky maple scent that wafts from the skillet. Or the crispy bits of fat intertwined with the chewy streaks of meat. Or the irresistible flavor it imparts to everything it comes into contact with. Bacon is just plain good. I’ve recently taken to making my own in bulk. In the driver’s seat, I can start with a relatively inexpensive slab of pork belly and create my own personal blend of salt, sugar, and seasonings to flavor it with. Plus, homemade bacon easily beats anything you’ll be tearing from a package bleary-eyed on Sunday morning.
How to Cure Bacon
What's more fun than learning how to make bacon at home?
Published Oct. 12, 2012.

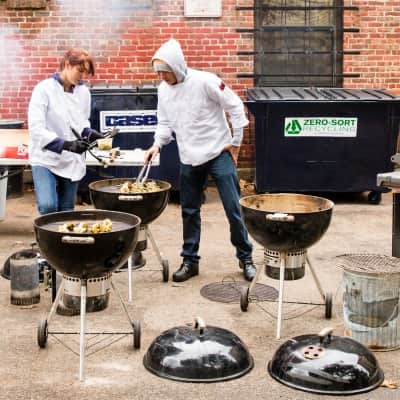
I developed this recipe using a smoker, which delivers moderate, indirect heat that allows the bacon to cook slowly and evenly. For those who don’t own a smoker, I also found a way to make my bacon using a charcoal grill. Just keep in mind that bacon cooked on a charcoal grill will render a bit more and pick up some extra smoky flavor and color because it is much closer to the heat source—but that’s not necessarily a bad thing.
This recipe calls for pink salt to preserve the meat’s pink color and add flavor. Pink salt is not just for seasoning; it also contains nitrites, so be sure to stick to the quantity listed.
What Is Pink Salt?
Curing salt goes by many names, including DQ Curing Salt and Insta Cure #1, but it's most commonly labeled pink salt, so that's the term we use in the test kitchen. Curing salt is important for curing meats because it contains nitrites, which prevent bacterial growth, boost the meaty flavor, and preserve the red color. You can find curing salt in specialty food stores or through online retailers such as Butcher & Packer. (Do not substitute Morton's Tender Quick or Insta Cure #2.)
Remove the Skin, Leave the Fat
When you buy pork belly, the skin is usually left intact; you'll need to remove it before proceeding. Start by separating the skin from the fat layer at one corner. Then, holding the knife almost parallel to the belly with one hand and the corner of skin with your other hand, make short horizontal cuts, pulling the skin back as you move across the belly. Take your time to ensure you leave as much of the thick layer of fat intact as possible. After all, fat absorbs flavor, so once you've cured and smoked the belly, you'll be glad you left it all on there.
Give It a Rub Down
Curing the pork belly adds flavor and firms it up. Use a 13 by 9-inch baking dish, though a 2-gallon zipper-lock bag would also work. Maple sugar is a good base for the rub as it gives the bacon a sweetness that perfectly complements the meatiness. The pink salt, which contains nitrites, prevents bacterial growth, boosts flavor, and preserves the meat's red color. You can omit it, but it's a smart safety measure. Plus, bacon made without pink salt just doesn't taste as good.
What Is Maple Sugar?
Maple sugar, which is made from maple syrup, is available in many grocery stores and online from King Arthur Flour and various Vermont maple farms.
When rubbing on the dry cure, be sure to cover the sides and edges of the belly well.
Let It Cure
Once you've coated your pork belly with the rub, cover the dish with plastic wrap and put it in the fridge. As the belly cures, it will release liquid, so you'll need to flip the meat every other day to ensure that the cure is evenly distributed and stays in direct contact with the meat.
After seven to 10 days, the belly will be fully cured, at which point it will feel firm to the touch yet still pliable. After a quick rinse under cold water to remove any excess cure (it will be too salty if you don't), it's ready to smoke.
Keep Your Cool
While smoking the belly, you need to maintain a moderate heat level. Too much heat and all the fat will render from the bacon; not enough and the bacon won't cook through. By placing lit coals on top of unlit charcoal in your smoker, you can achieve the appropriate temperature (200 to 225 degrees) without having to replenish coals halfway through cooking.
The water pan in the smoker also helps to temper the heat. If you're making bacon on a charcoal grill, create indirect heat by arranging unlit and lit coals on one half of the grill and a water pan on the other half.
Smoke Break
Next, place the wood chunks on top of the charcoal. It takes about 5 minutes for them to start smoking. Wait until the initial burst of smoke passes before putting the meat in the smoker; the intensity of the first few seconds of smoke can impart a bitter flavor to the meat.
It's best to place the pork belly fat side up to allow the rendered fat to baste the meat. If you're using a charcoal grill, make sure to place the belly on the cooler side of grill, over the water-filled pan.
A Real Beauty
After about 1½ hours in the smoker, the bacon will register 150 degrees and have a deep amber hue. Since the bacon is smoked until it registers 150 degrees, it is fully cooked once you take it out of the smoker.
Have a Slice… or Five
Since the bacon is fully cooked, frying isn't necessary. You can slice it paper-thin and serve it cold. When served cold, the smoke flavor is much more forward. Pan-frying the bacon tames its smokiness. Whichever way you slice it, this bacon is delicious.
More from Cook's Illustrated

Recipe
Homemade Bacon
Cooking low-and-slow for nearly 2 hours over pungent hickory chunks imparted just the right amount of smoke flavor without overwhelming the pork.Get the Recipe

Recipe
Oven-Fried Bacon
For perfectly crisp, evenly cooked bacon with no hassle, use the oven instead of the frying pan.Get the Recipe

Recipe
Home-Corned Beef with Vegetables
Once you find the right curing method, corning beef requires no work, just time. And the results are superb.Get the Recipe

Taste Test
Artisanal Bacon
We tasted seven artisanal bacons to find out which one is worth the splurge.Read Our Review

Equipment Review
Slicing/Carving Knives
Want perfect slices at your holiday table? Lose the chef’s knife.Read Our Review

Equipment Review
The Best Smokers Less Than $500
Ready to get serious about making barbecue at home? These entry-level smokers are your best bets.Read Our Review
Equipment Review
Charcoal Grills
We’ve happily made do with Weber’s basic kettle for years. But would newer, more tricked-out charcoal cookers be worth the upgrade?Read Our Review

Equipment Review
The Best Chimney Starters
If you grill with charcoal, you need a chimney starter. Does it matter which one you buy?Read Our Review
