It’s been months since I—and thousands of others after me—started what I affectionally dubbed my “quarantinystarter.” While typical formulas start with several cups of flour, and you might churn through a few pounds before you can bake a single loaf of bread, this starter takes just a few teaspoons to get going and uses just a few cups total before it’s ready to bake with. Making a tiny starter is an idea that I came up when flour (and yeast) was scarce due to the pandemic. But I quickly realized that this is a smarter, substantially less wasteful approach to maintaining sourdough starter under any circumstances.
Cooking Tips
Sourdough Starter Master Plan
Making starter is simple, but nurturing the flour-water mixture into a mature culture can be confusing. I’ve mapped out the process and answered common questions.
Published May 8, 2020.

Jump to a Section
The Process in a Nutshell
A sourdough starter—also called a culture or levain—is a mixture of flour, water, and microorganisms that flavors and leavens bread. Wild yeasts and bacteria are naturally present on wheat kernels and on flour ground from them, but it takes time and proper care for them to multiply and transform the initial mixture into a bubbly, boozy-scented culture that can leaven bread.
First, you mix flour and water and let the mixture sit for a day or longer until the dormant microorganisms on the flour wake up. After that, you “refresh” (or “feed”) the nascent culture first on a daily and later on a twice‑daily basis by moving a portion of it to a new mixture of flour and water and discarding the remainder. (Don’t worry about waste—you can save the leftover portion as backup and for use in other applications.) After a few weeks, the starter will have built up a sufficient amount of the appropriate yeasts and bacteria it needs, and it can be used in baking.
One important thing to note, though, is that the time frame of each step is approximate. How quickly your starter moves from one stage to the next will depend on the flour you're using to refresh it and how hospitable the environment is for yeast and bacteria activity. Let visual and olfactory cues be your guide and use the day count as a reference.
Ingredients and Equipment

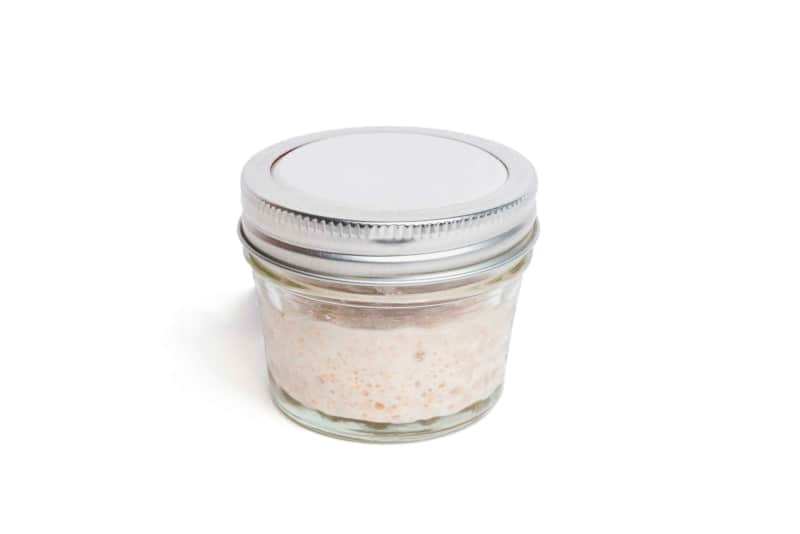
You are more likely to be successful the most quickly if you are working with organic flour (which is richer in microorganisms than conventional flour) and filtered or bottled water (which is free of chlorine that might kill those essential microbes) to create the starter. Be sure to include both white and either whole-wheat or rye flour in the bulk flour mixture; whole-grain flours are more nutritious than white flour and are more likely to contain the bacteria and yeast we want, making them ideal nourishment for the nascent culture. (Once the starter is mature, you maintain it with just white flour; nonorganic is fine.) Your starter container should be covered well but loosely; inverting the mason jar lid will allow the culture to breathe while still preventing it from drying out. Clear containers are useful to allow you to see what is going on under the hood, and narrow ones do a better job of letting you see when the mixture is expanding in volume.
- 2 small, lidded containers, such as 4-ounce canning jars
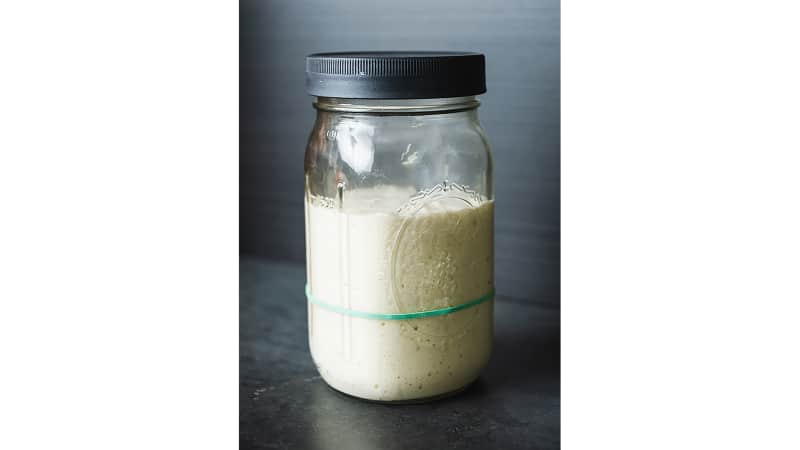
- 1 larger, lidded container, such as a 16-ounce canning jar
- 11/2 cups organic bread or King Arthur all-purpose flour
- 11/2 cups organic whole-wheat or rye flour
- Warm room-temperature (70- to 80-degree) bottled or filtered water
STEP 1: Create and Proof Initial Starter

Time frame: 1 to 3 days
Create bulk batch of flour mixture by combining 1½ cups bread or all-purpose flour with 1½ cups whole-wheat or rye flour in sealable container (weighing ingredients will become vital later, but volume is fine here). Using spoon, mix 4 teaspoons (⅓ ounce; 10 grams) flour mixture and 2½ teaspoons (⅓ ounce; 10 grams) water in small jar. Cover with plastic wrap or loosely with lid and let sit at warm room temperature (70 to 80 degrees). Check your jar every 24 hours for activity. When it’s woken up, it should be bubbly and wet-looking, and will likely have a pungent, even offensive aroma. If it isn’t exhibiting these signs, put it back in its warm spot and check again in another day or so.
Cue to move to the next step: Starter is bubbly, wet-looking (there might be liquid pooled on top), and fragrant—even pungent.
STEP 2: Refresh Once Daily

Time frame: 4 to 10 days (timing may vary widely)
Stir starter well and transfer 2 teaspoons (1/3 ounce; 10 grams) to clean jar; reserve remaining starter as backup in original jar and store in refrigerator (see Save Your Sourdough Starter Leftovers). Stir 4 teaspoons (⅓ ounce; 10 grams) flour mixture and 2½ teaspoons (⅓ ounce; 10 grams) water into starter mixture until no dry flour remains. Cover with plastic wrap or loosely with lid and let sit at warm room temperature for 24 hours. Repeat this feeding (or “refreshment”) procedure every 24 hours. Note: Over time the look and smell of the culture will evolve, and it will likely get quite quiet. This throws a lot of people off, since they think it should look bubbly and smell fragrant the whole time. It likely will not; do not worry about this, just repeat as directed. Eventually, your nascent starter should start getting very active,
Cue to move to the next step: Starter is bubbly and fragrant less than 12 hours after the previous refreshment.
STEP 3: Refresh Twice Daily
Time frame: 10 to 20 days (again, timing may vary widely)
Refresh starter as before every 12 hours (but only if the starter is bubbly and fragrant less than 12 hours after the previous refreshment—do not jump the gun here.) At this stage, in addition to saving leftover starter as backup, you can collect generations of backup starter in the larger sealed jar; store it in the refrigerator to keep on hand for use in other nonbread applications such as pancakes, biscuits, and crackers (see Save Your Sourdough Starter Leftovers). If at any point the starter activity slows down or stops altogether, return to refreshing the culture once daily.
Cue to move to the next step: Starter doubles or triples in volume within 12 hours of being refreshed and smells yeasty/bready/yogurt-y.
STEP 4: Check Readiness for Baking

Conduct a “float test”: Place a blob of starter in a jar with water. If the starter floats, it’s producing and retaining ample amounts of carbon dioxide, meaning the yeast population has increased sufficiently.
STEP 5: Care and Maintenance of a Mature Sourdough Starter
Once you are sure your starter is mature, you are now free to store your starter in the fridge between uses by following the instructions in this article: Care and Maintenance of a Mature Sourdough Starter. (But please don’t jump the gun and start cold-storing your culture before it is fully mature. If you do, it probably won't bake well, and it won't ever get to that point if kept in cold storage. Feed it at room temperature until you are getting reliable results with it; it's a hassle, but worth it compared to the frustration you'll experience working with a sluggish starter. That said, if you need a break from the once- or twice-daily feedings, you can always put it in the fridge for a few days just to give yourself a vacation.)
Top Sourdough Starter FAQs
Question: My starter looks inactive; should I start over?
Probably not. Visible activity tends to slow down after the first five days, but things are happening whether or not you can smell or see them. However, if your starter continues to look inactive, it might be because the flour mixture doesn’t contain enough gluten-forming proteins to retain the gases that are being generated, or it might be because it needs to mature more. In either of these cases, you might want to try one or more of the following:
- If you are still refreshing on a once-a-day schedule, try stirring in a touch of fresh flour at the 12-hour mark.
- Try leaving the starter for longer than 12 or 24 hours (depending upon whichever stage you are at), until it shows clear activity.
The only sign that you need to start over is the appearance of mold, which looks like black, blue, or pink growth on the surface of the culture, which can occur if the starter is stored in a too-warm (above 80 degrees) environment. Discard the culture and refresh your backup culture, or start over from the beginning.
Question: My house typically runs cold. Where’s the best place to keep my starter?
If your kitchen is below 70 degrees, try storing your starter in one of the following places (but make sure that these areas—or anywhere that you might store your starter—aren’t more than a degree or so above 80 degrees, which can encourage the growth of unwanted molds):
- On top of the refrigerator
- In a turned-off oven with the light turned on
- On a wire rack set over a heating pad or seedling mat set to low
- In your microwave oven (take it out before using the oven)
- In a small cooler or cooler bag
Question: Why do you have to discard starter when “refreshing” it?
The answer is twofold. First, moving just 30 percent of your starter to a new, clean home and adding more flour and water dilutes the waste byproducts of fermentation that could harm the microorganisms you are trying to propagate. Second, the “discard” process ensures that the amount of starter you maintain is manageable and doesn’t quadruple each day.
Question: How can a starter so tiny ever be enough to bake bread?
The amount of starter you maintain from day to day is not a reflection of how much you will have for baking, since a starter of any size can be scaled up once it’s mature. (Instead of discarding the excess, you’ll mix it all into a larger quantity of flour and water.) Maintaining a small amount of starter simply minimizes waste during the starter creation process.
Question: How will I know when my starter is ready to bake with?
A mature starter will show the following three indicators:
- It doubles or triples in volume within 12 hours of refreshing at room temperature.
- It passes the“float test” (see STEP 4 above).
- It smells yeasty/bready/yogurty/vinegary.
Sourdough Recipes

Ready to bake or use up that discard? Try one of these recipes:
